Obinskit User Manual
1. Getting Started
1.1 Supported Platforms
| System | 32bit | 64bit |
|---|---|---|
| Windows 7 | √ | √ |
| Windows 8 | √ | √ |
| Windows 10 | √ | √ |
| Mac OS X | - | √ |
| Debian, Ubuntu, Red Hat, Fedora | - | √ |
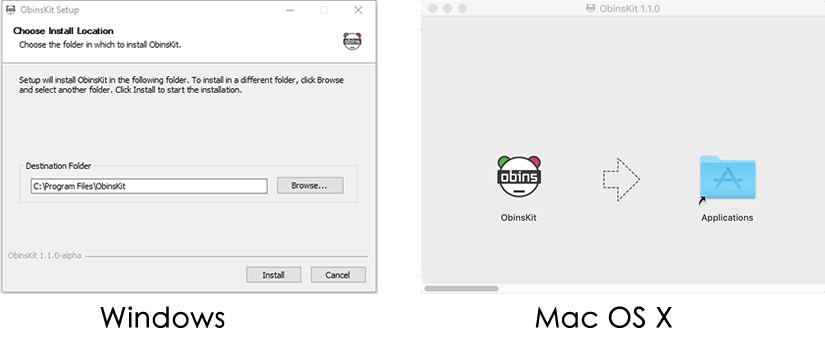
1.2 Installation
- Download the installation package: https://www.hexcore.xyz/obinskit
- Install
1.3 Start Up
The function of macro record need a special authorization, and some anti-virus software may block it, please choose trust it.
Tips: Please always download ObinsKit from here, we can not guarantee the security of software downloaded from other channels.
Windows
Click the shortcut on the desktop

Mac OS X
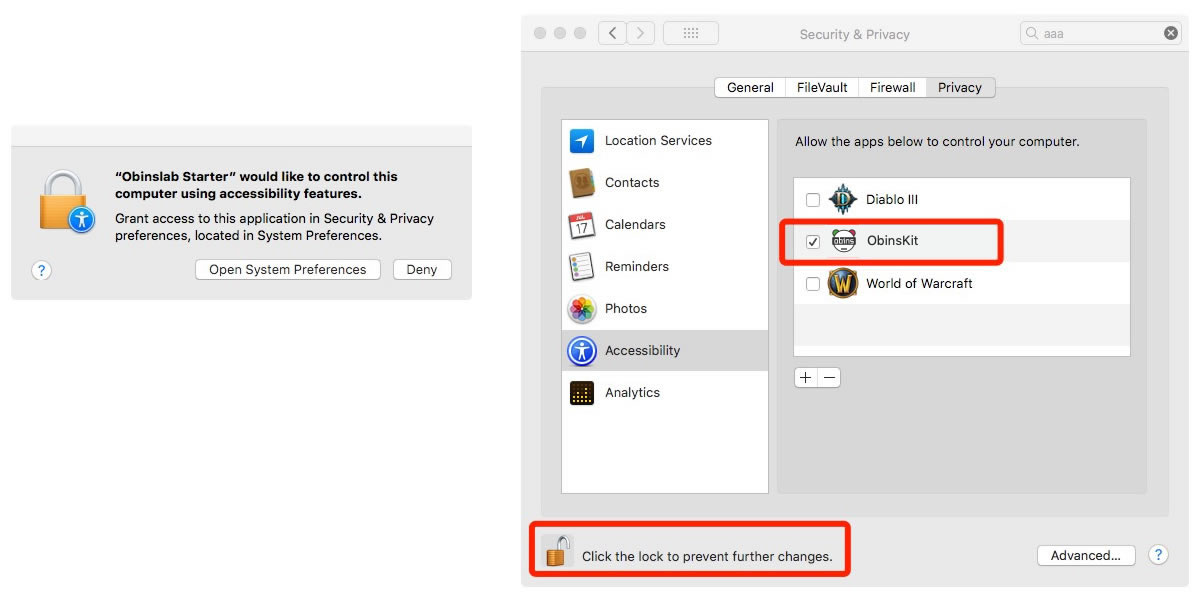
The first time launch ObinsKit, you will see the alert below, please authorize ObinsKit by clicking Open System Preferences in the alert, then selecting the checkbox for ObinsKit in the Privacy pane.
2. Quick Guide
2.1 Device List
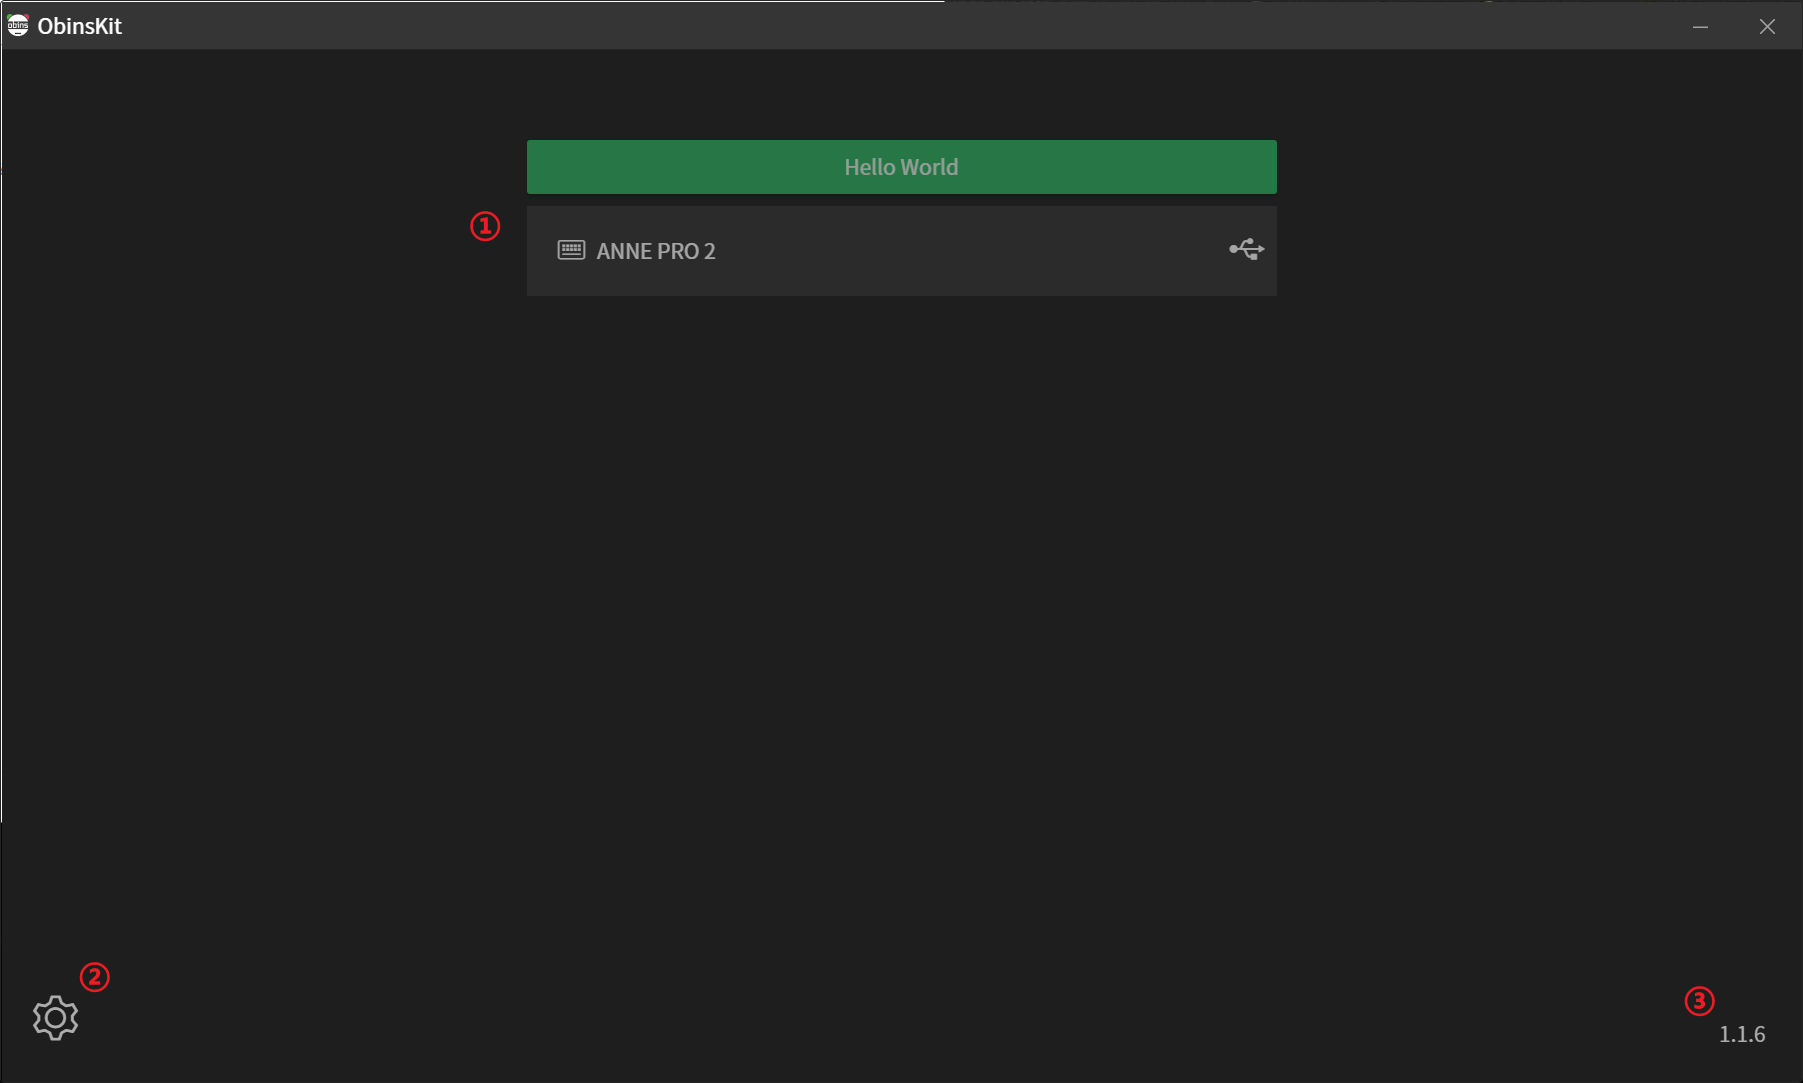
Device List
Show the devices connected.
Click Hello World to refresh device list.
Preferences
- Setting
- Update
- Help
- About
Software Version
The current version of ObinsKit
2.2 Keyboard Setting
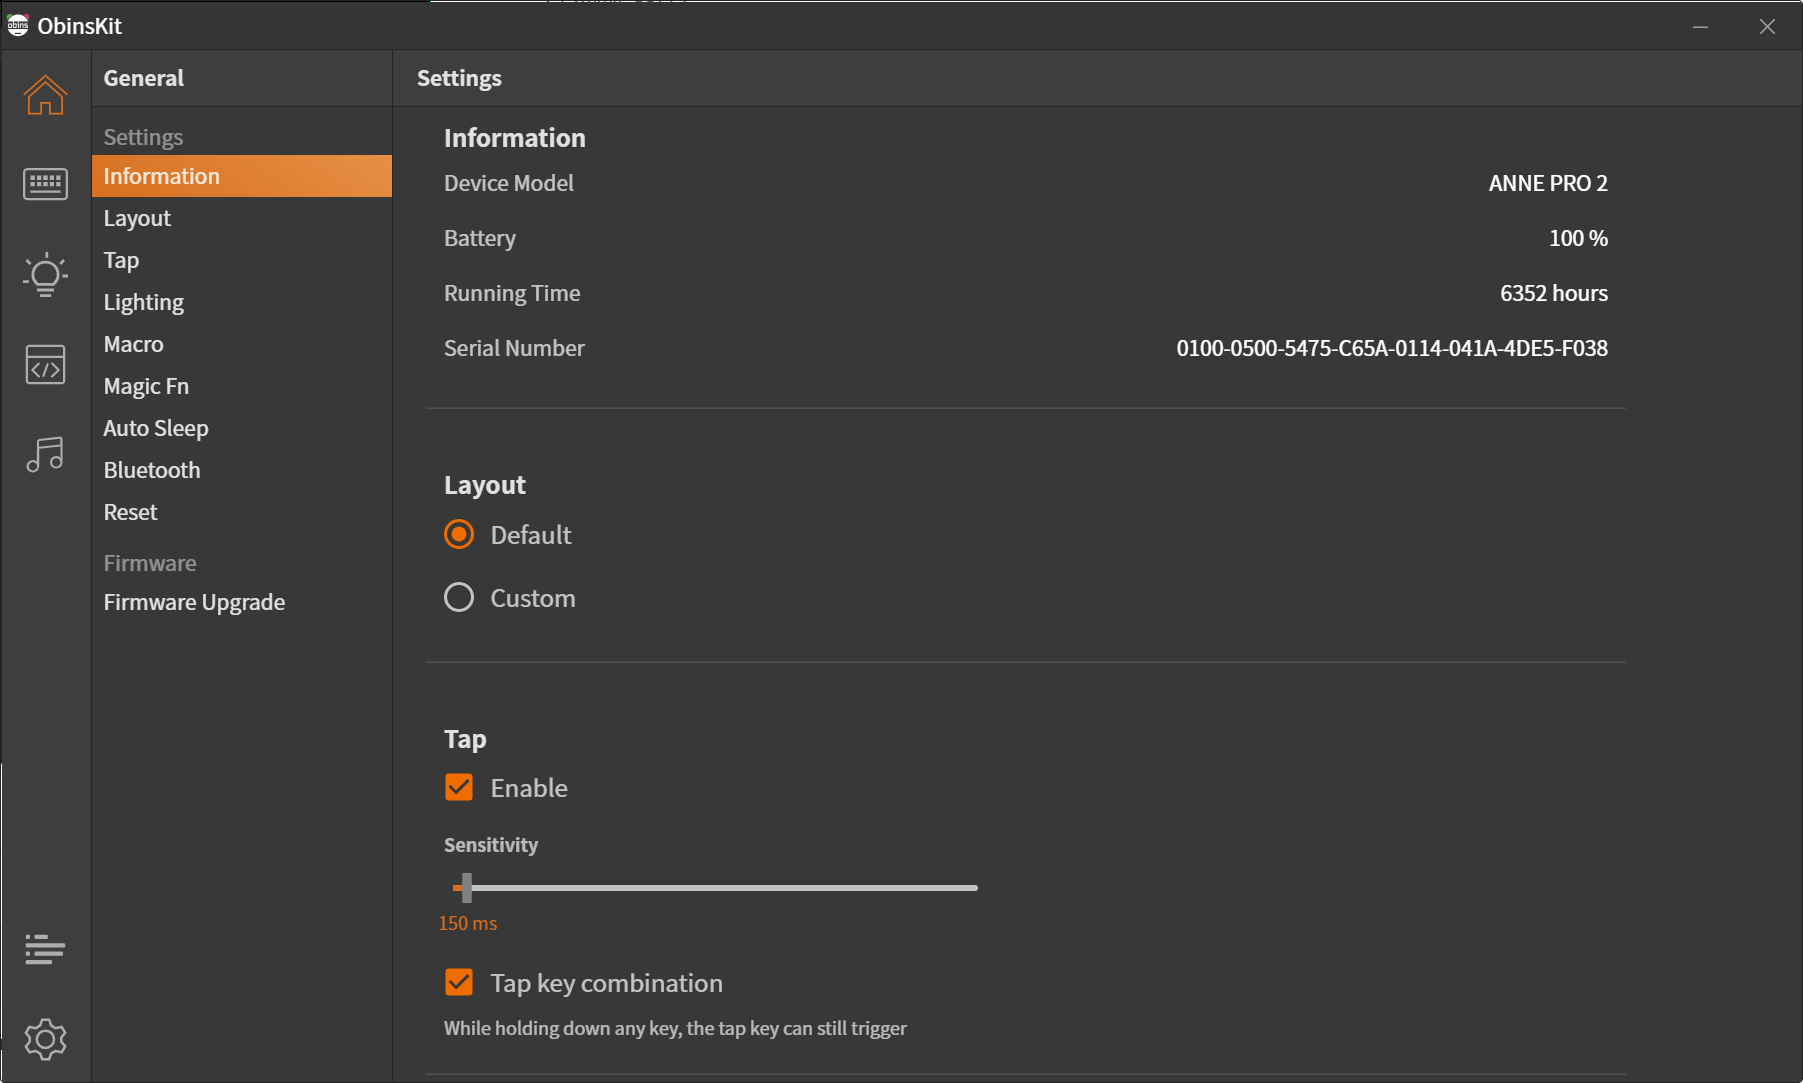
| Title | Description |
|---|---|
| Information | Show Device Model, Battery, Running Time, Serial Number and click Serial Number to copy |
| Layout | Default: Default keyboard layout; User: User customized keyboard layout |
| Tap | Switch for the function of TAP layout and Tap key combination |
| Lighting | Setting backlight and all key CapsLock LED |
| Macro | Switch for the function of macro |
| Magic Fn | Magic FN allows your CapsLock key to act as FN1 or FN2 |
| Auto Sleep | In wireless mode, no any operation in setting time, the keyboard go to sleep |
| Bluetooth | Clear Bluetooth bound info saved on keyboard |
| Reset | Restore factory settings |
| Firmware Upgrade | Update the latest firmware or the historical firmware |
2.3 Layout Setting
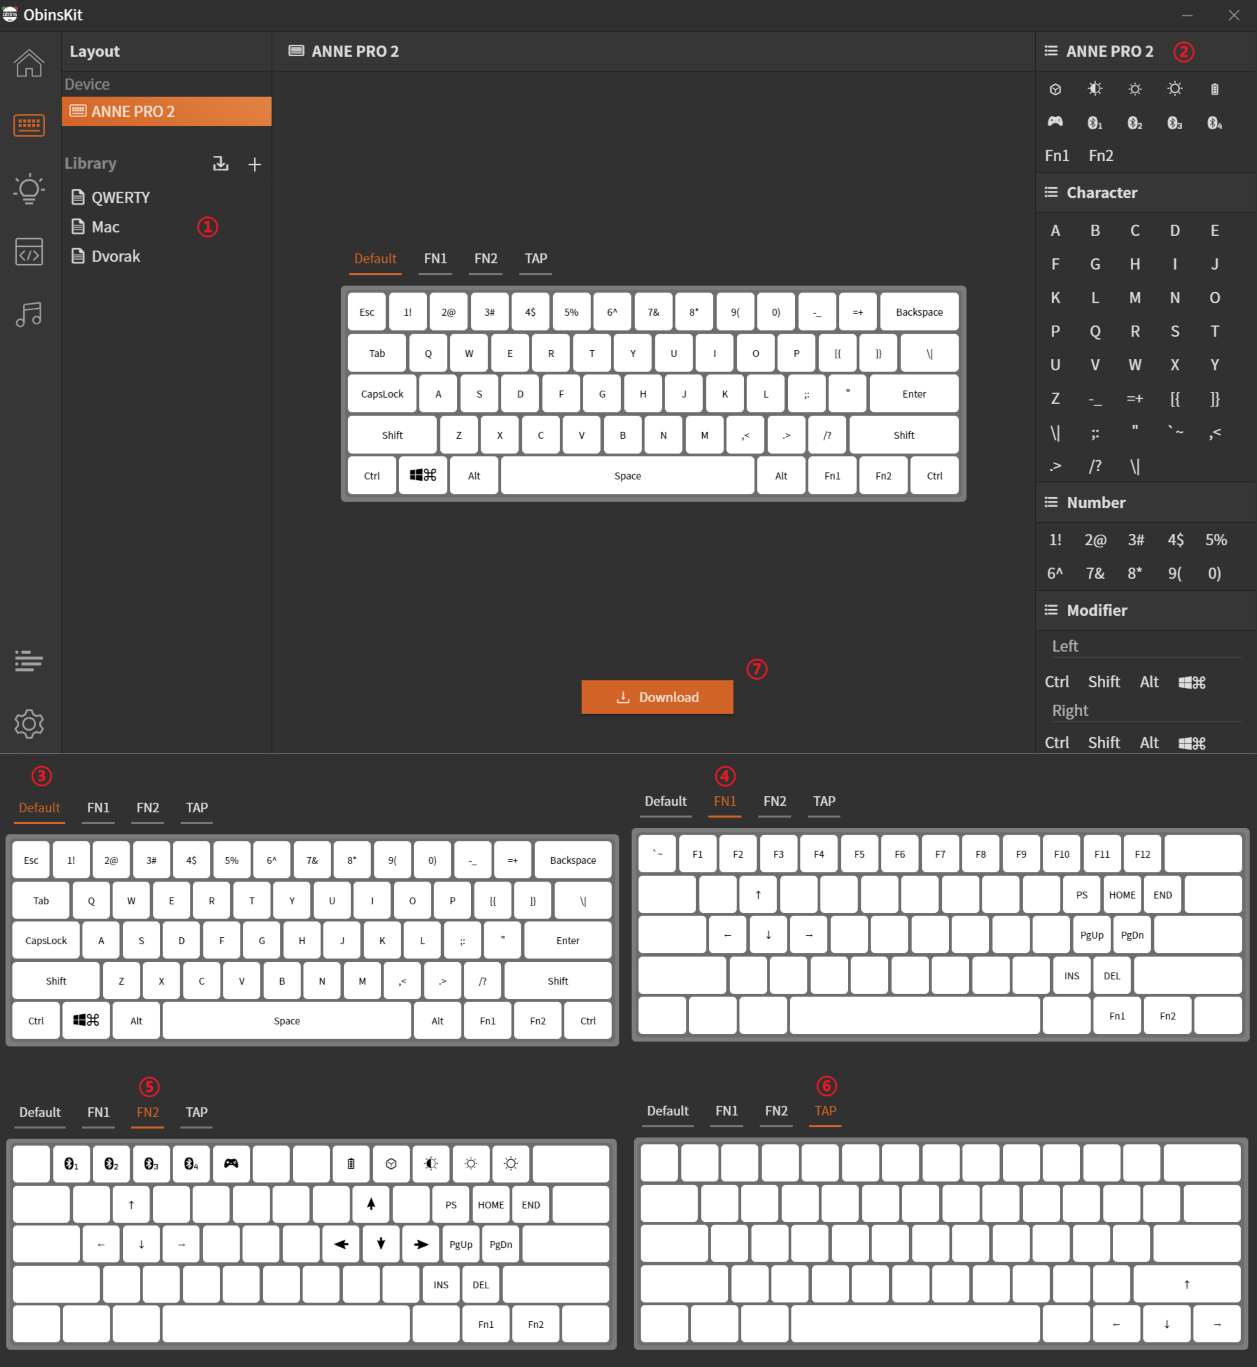
Layout
Current: Layout read from keyboard.
Qwerty, Mac, Dvorak: Preset layout.- Click on icon
+to add a new layout - Right click on Current to Copy
- Right click on preset layout to Copy/Reset(set to default)
- Right click on user layout(added/copied) to Copy/Delete/Rename
- Double click on user layout to Rename(Enter for save, Esc for cancel)
- Click on icon
Key code table
Here list HID Key Code and keyboard special function keys
Default
The default layout, tap to trigger
FN1
Hold Fn1 to trigger
FN2
Hold Fn2 to trigger
TAP
Usually set key code on modifier key to extend it.
To use TAP, non't forget to enable TAP option at keyboard setting page
Download
Download the selected layout to keyboard.
If layout is seated to "Default", download a layout will rewrite it to "User" automatically
ANNE PRO 2 have four layers, they are TOP、FN1、FN2、TAP.
There are two ways to update keycode:
- Drag the selected keycap, and drop on another keycap
- Select a keycap, choose new from Key code table
2.4 Light Setting
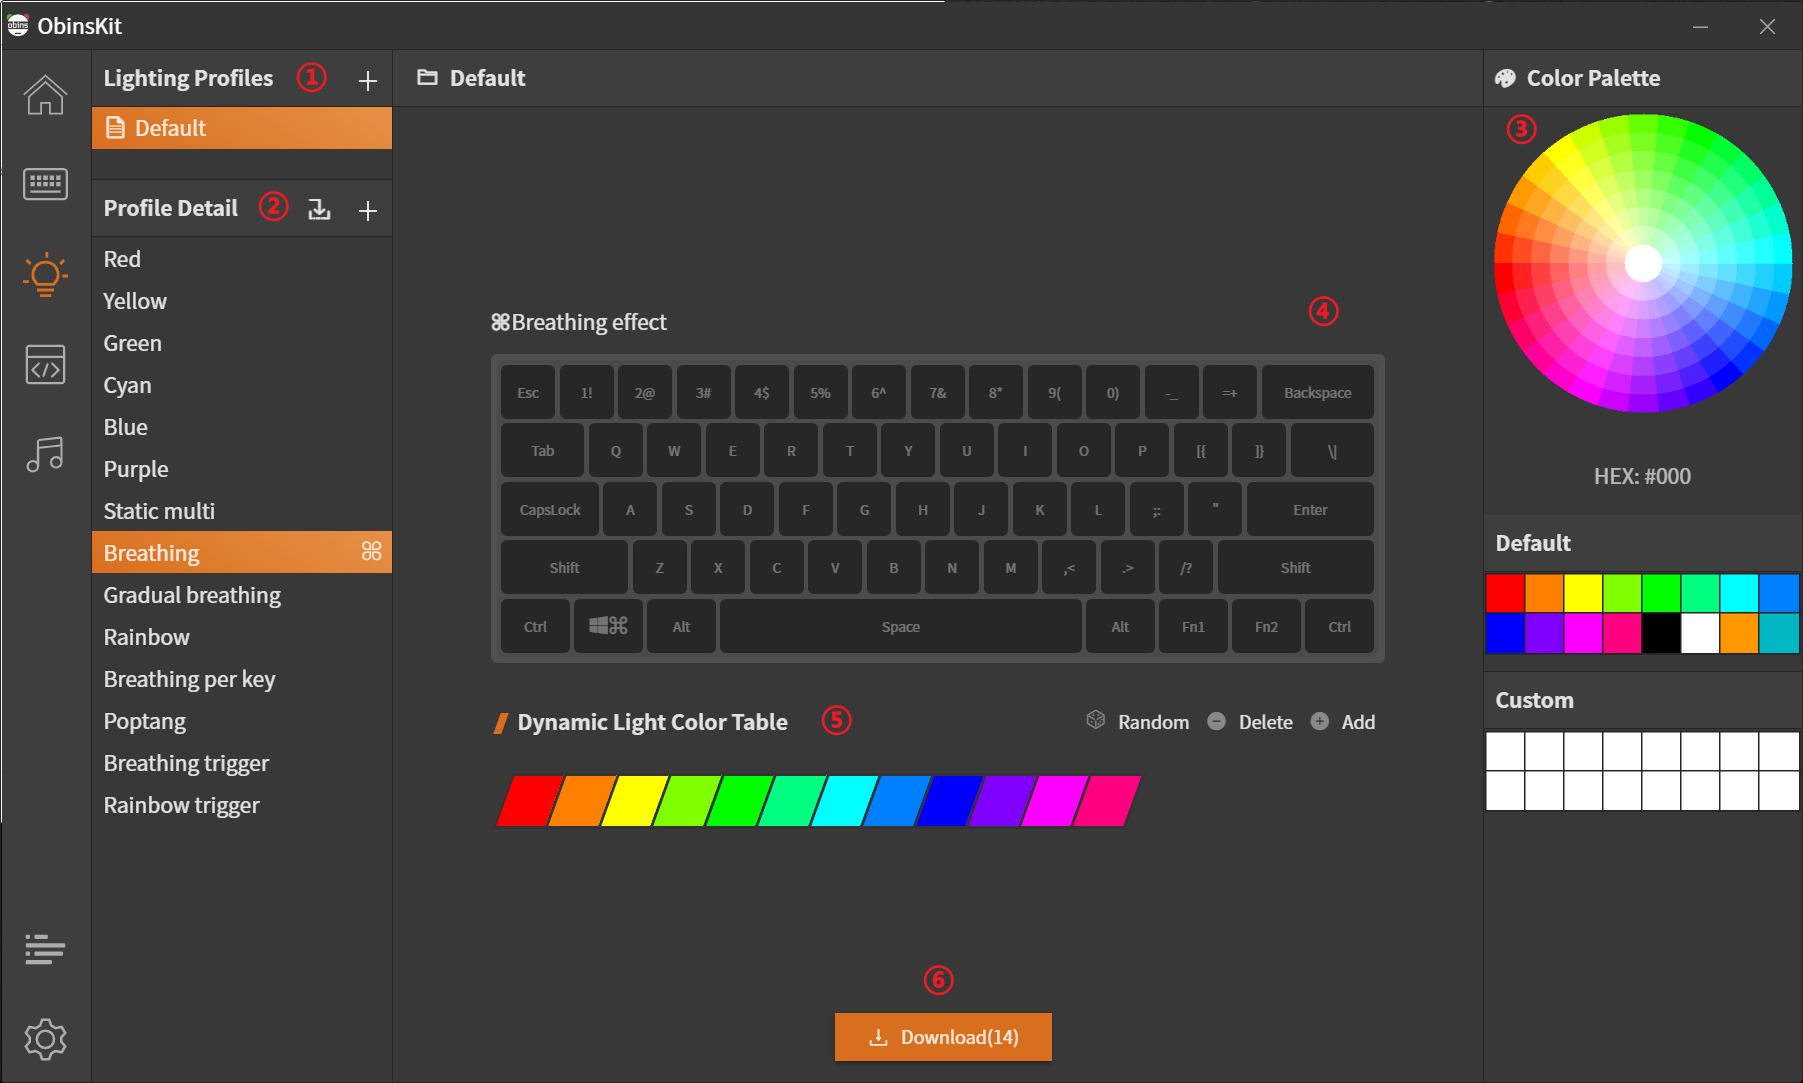
- Lighting Profiles
Click on icon
+to add lighting profilesRight click on custom lighting profile to Delete /Clone
Double click on custom lighting profile to Rename
Right click on the Default lighting profile to Clone / Reset(set to default)
Prifile Detail
- Click on icon
+to add light effect(Limited to max 16) - Click on light effect to Rename / Copy / Exprot / Delete
- Right click on blank space to Paste the light effect copied
- Drag the light effect to sort
- Click on icon
Color Palette
- Pick color on the color wheel
- Pick color from Default/Custom color block
- Right click on custom color block to save the current color
Setting Static Light
Setting static single or static multiple light effect:
- Select single/multiple keycap, and then pick a color on Color Palette
- Click on blank space to clear selected keycaps
Dynamic Light Color Table
Setting color for dynamic light effect
Apply
Apply all the light effects listed in the selected lighting profile to keyboard
2.5 Macro Setting
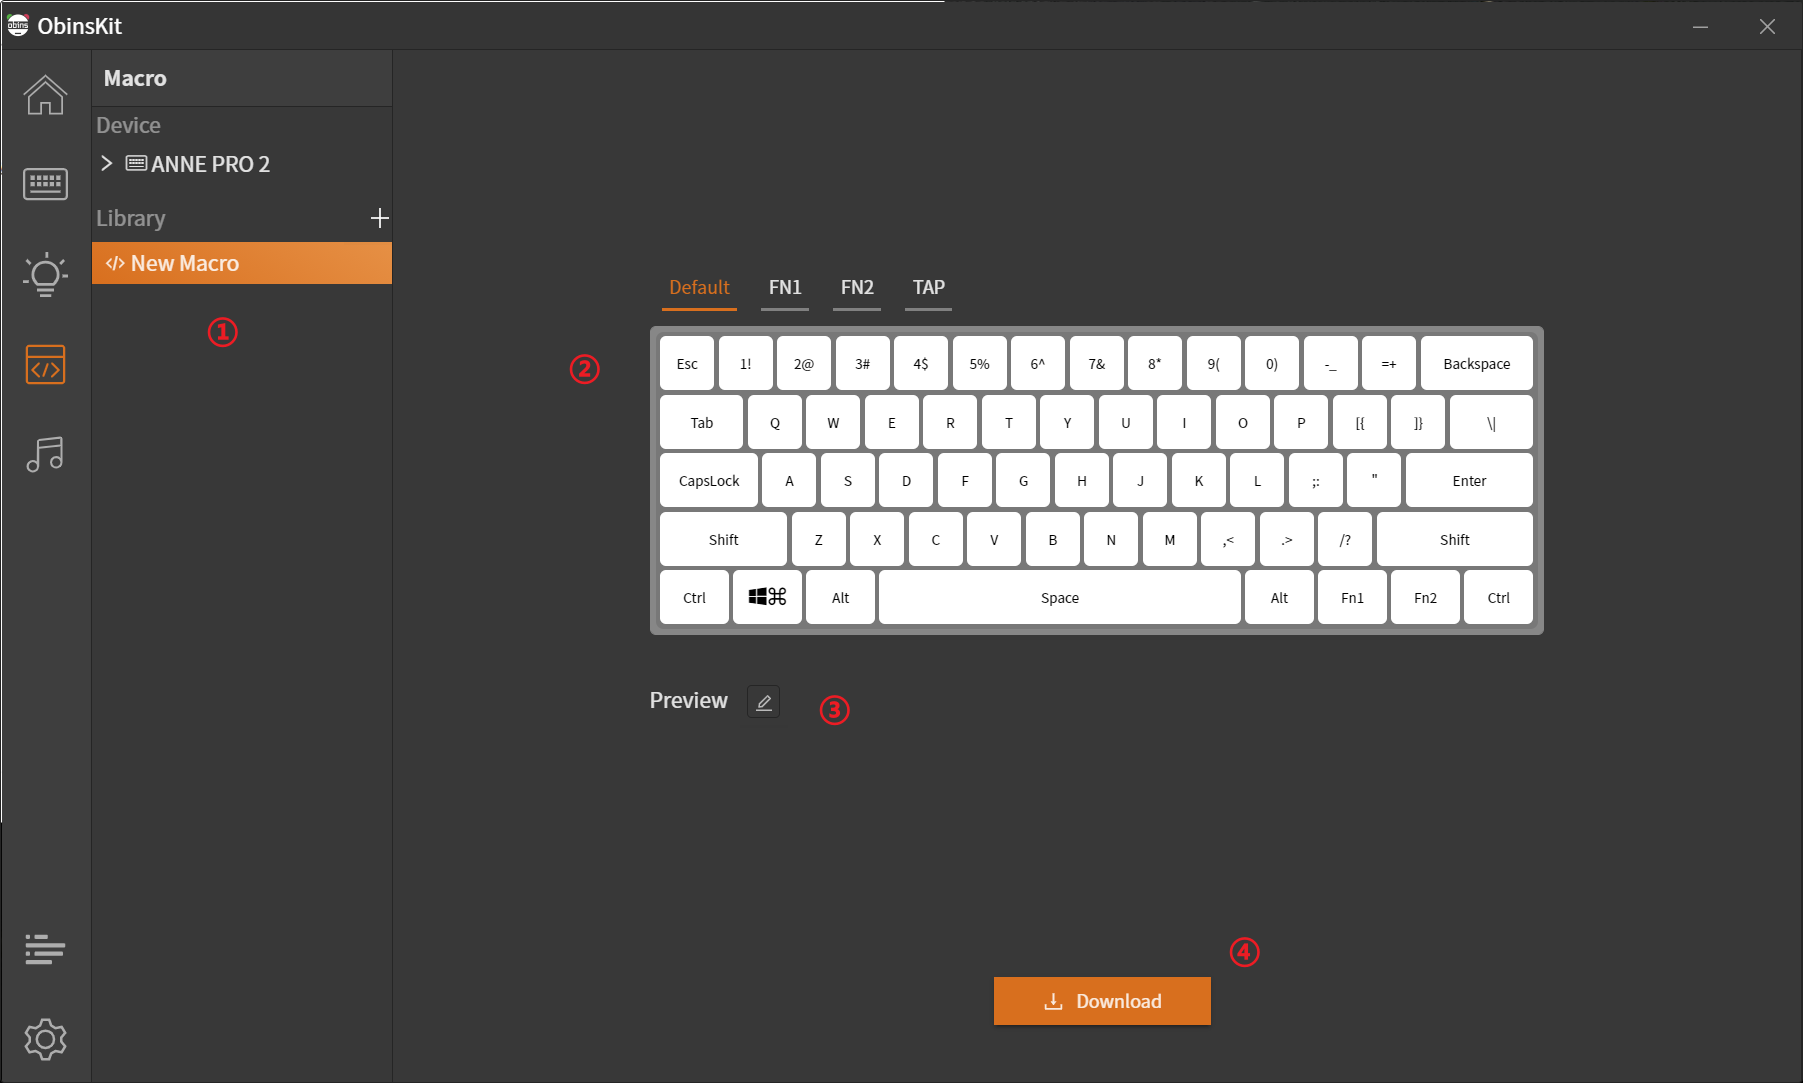
Macro
Click on icon
+to add macroRight click on macro to Bind to key/Rename/Edit/Delete/Copy/Paste
Double click on macro to Rename
Bind Macro
Indicates the distribution of the macro program's trigger keys on the keyboard
Select the macro created in
Libraryand right-click on the trigger button to Add/Remove Macro ProgramLeft-click the trigger button on the keyboard, right-click
macrosinlibraryand click Bind to key
Record Macro
Click the edit button next to
Previewto enter the recording interface of the macro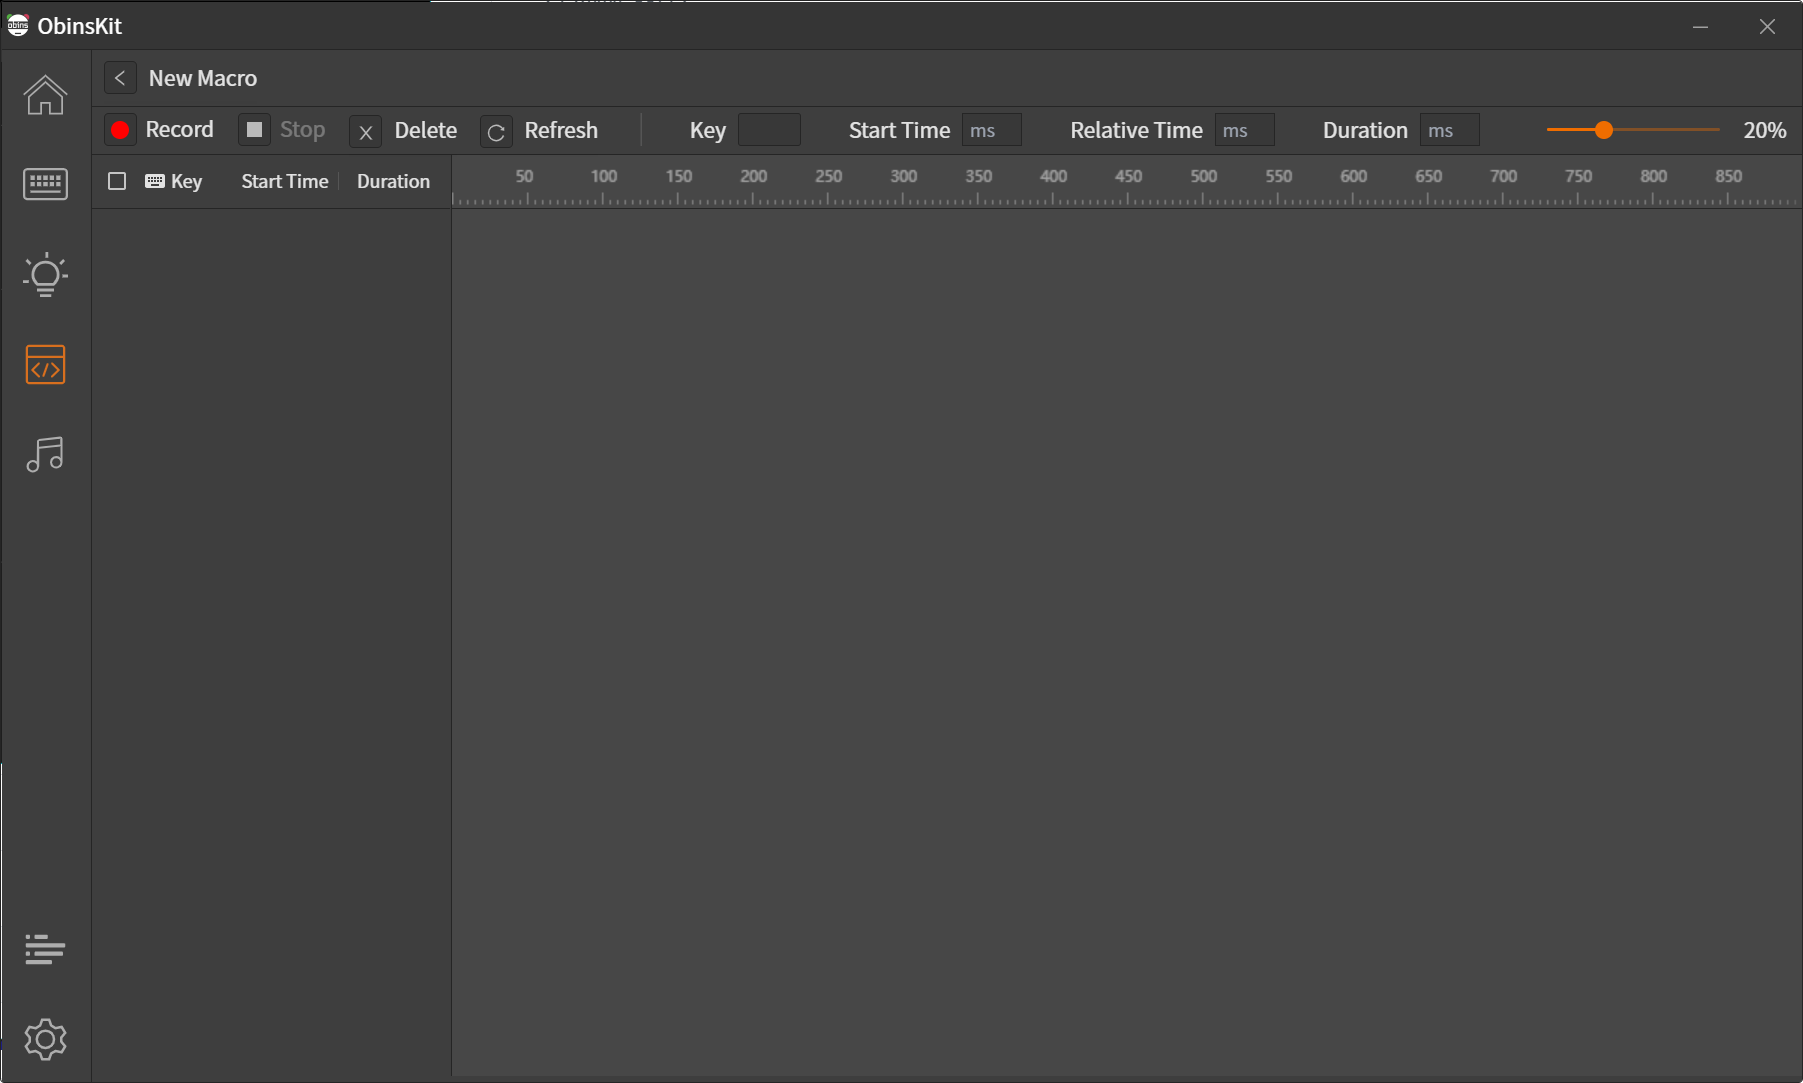
Click the
Recordbutton to record macrosPress the key to execute on the keyboard
Click the
Stopbutton to complete the recordingEvery key can be selected and
Deleteat the topYou can select the key and modify
key,Start Time,Relative Time,Duration
Download
Download the macros to the keyboard
2.6 Audio Visualization
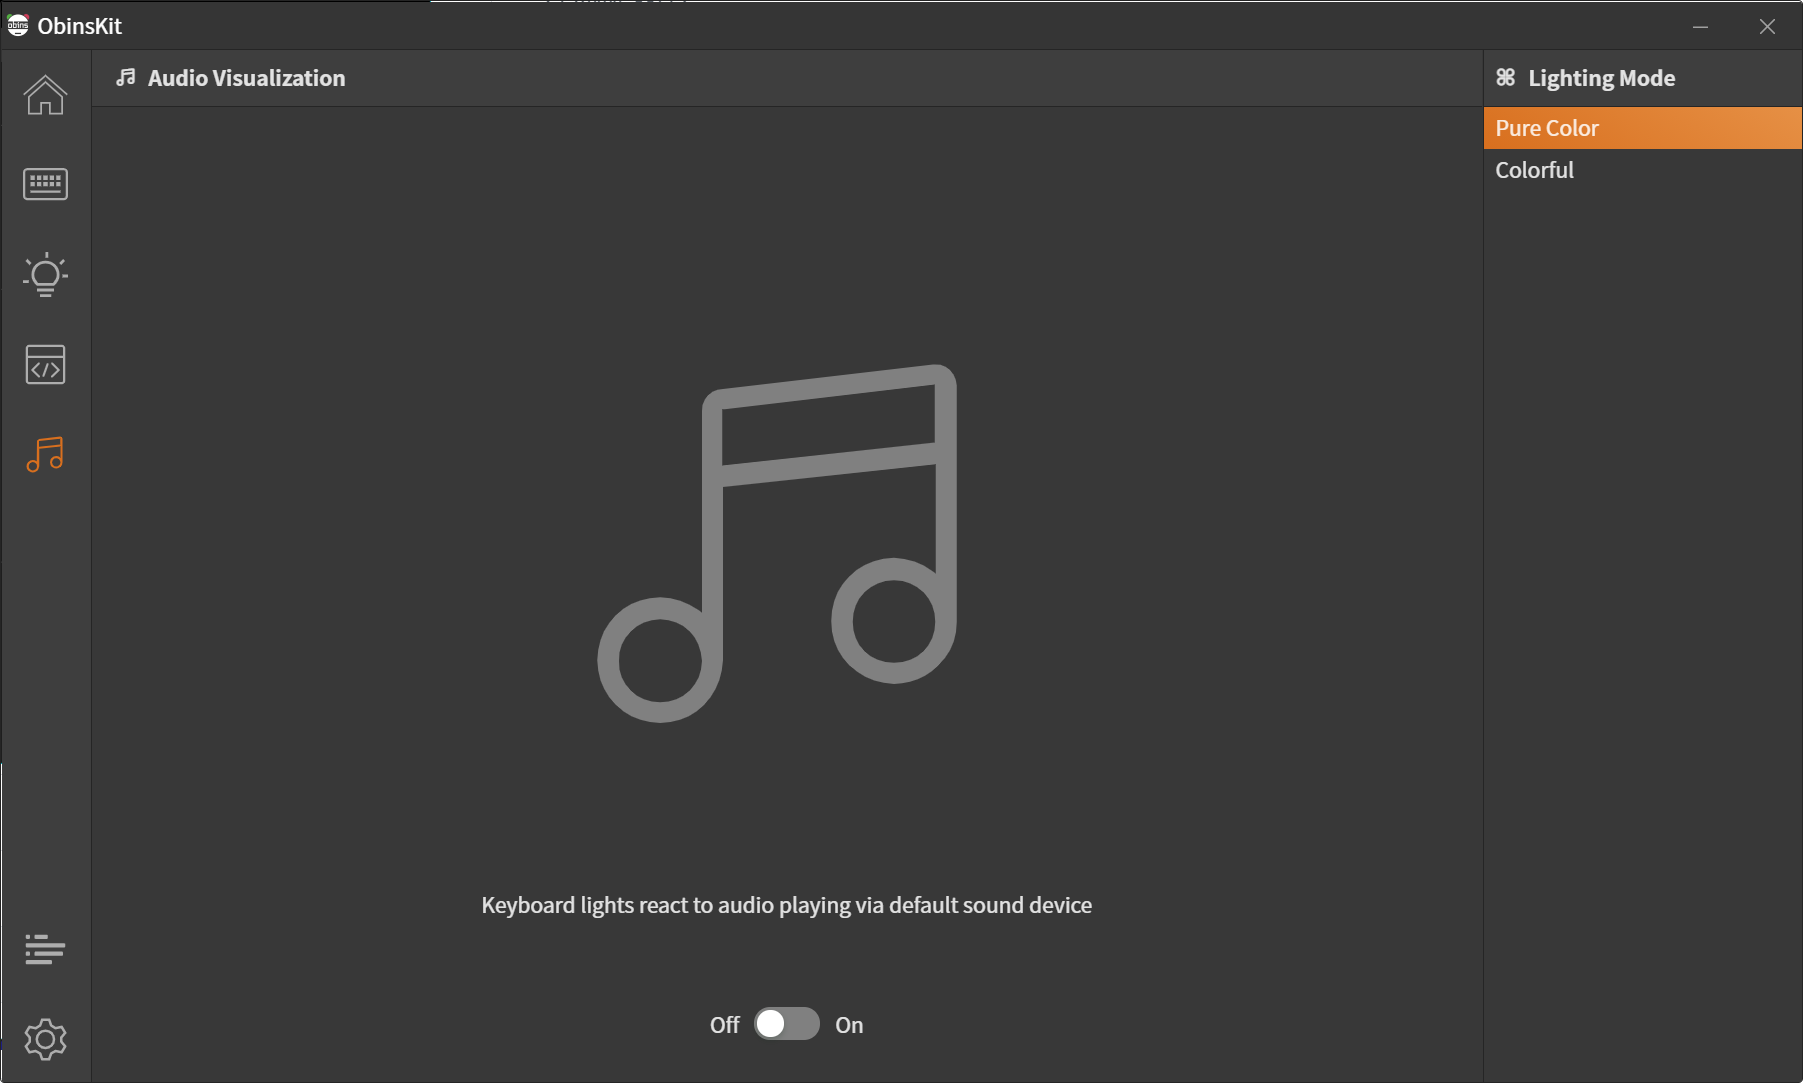
Only for OS: windows right now.
Keyboard lights react to audio playing via default sound device
2.7 System Enhancement
Tips: This module is currently only available on OS: Windows
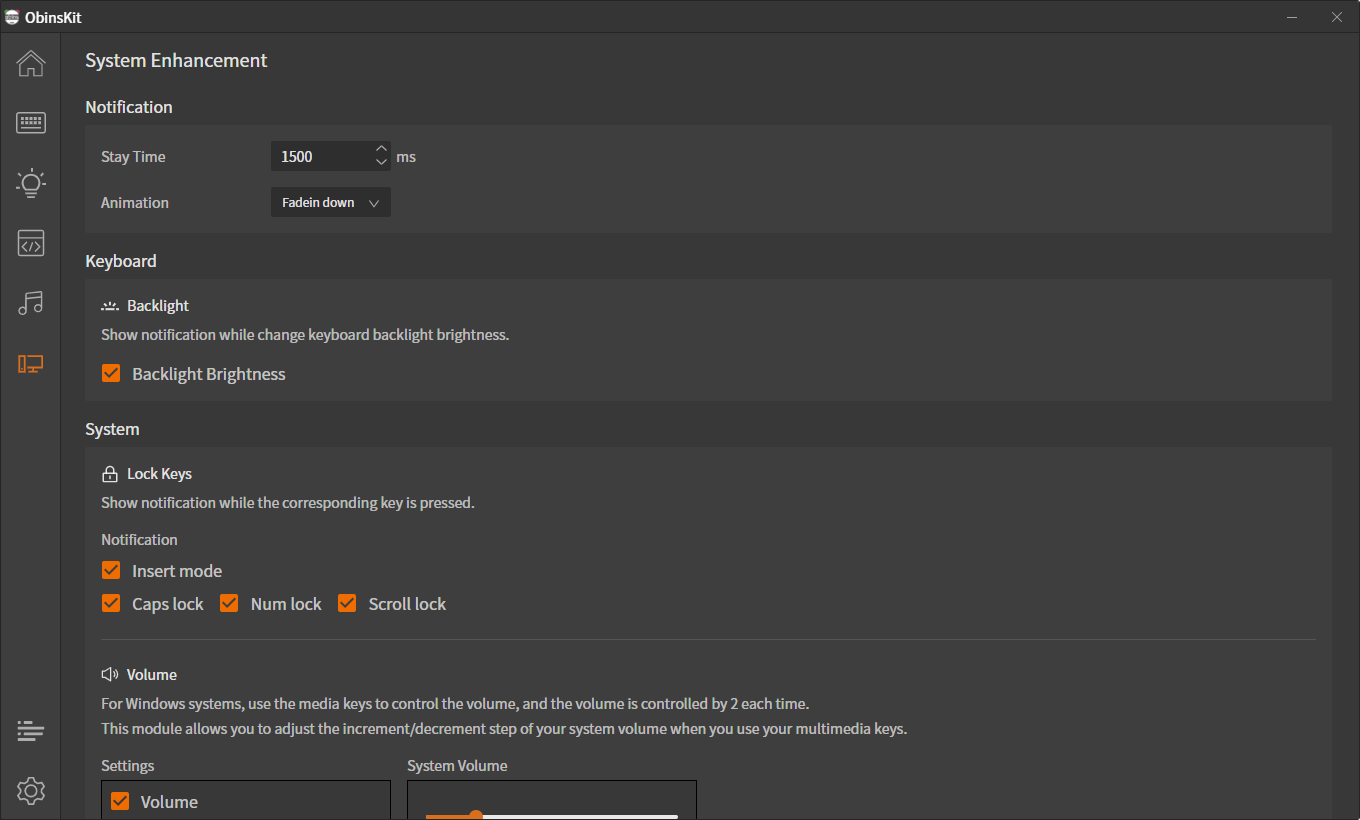
2.7.1 Notification
Stay Time: Set the stay time of the notification, Range: 1000-5000 ms
Aniamtion: Set the animation when the notification window appears
Move the notification window: Move the mouse to the area shown in the figure above, and drag.

2.7.2 Keyboard
Backlight

Show notification when the keyboard backlight brightness is set on the keyboard.
2.7.3 Lock Keys
Show notification when Caps Lock, Num Lock, Scroll Lock or Insert key is pressed on the keyboard.
| Lock Key | Notification |
|---|---|
| Caps Lock |  |
| Num Lock |  |
| Scroll Lock |  |
| Insert |  |
2.7.4 Volume
Show notification when Increase Volume, Decrease Volume or Mute key is pressed on the keyboard.

Tips: By default, volume step is 2(On windows) for the Increase Volume or Increase Volume key on the keyboard. This module allows you to change the step of control (range: 1-10).
2.7.5 Display
This module allow you to adjust the display brightess or change the display input source(DP, HDMI etc...)
Display brightness

Press
Display Brightness IncreaseorDisplay Brightness Decreasekey on keyboard to control the display brightness (the display which the mouse is located).Display input source
This module allows you to switch the display input source, which is especially convenient when one display is connected to multiple computers.
Compatibility:This module uses DDC (Display Data Channel) to control the displays. Common reasons for displays not being supported:
- Display not support DDC/CI, or it's disabled on display - If your disabled supports DDC/CI, it may need to be turned on. You can typically find this using the On-Screen Display using your display's controls.
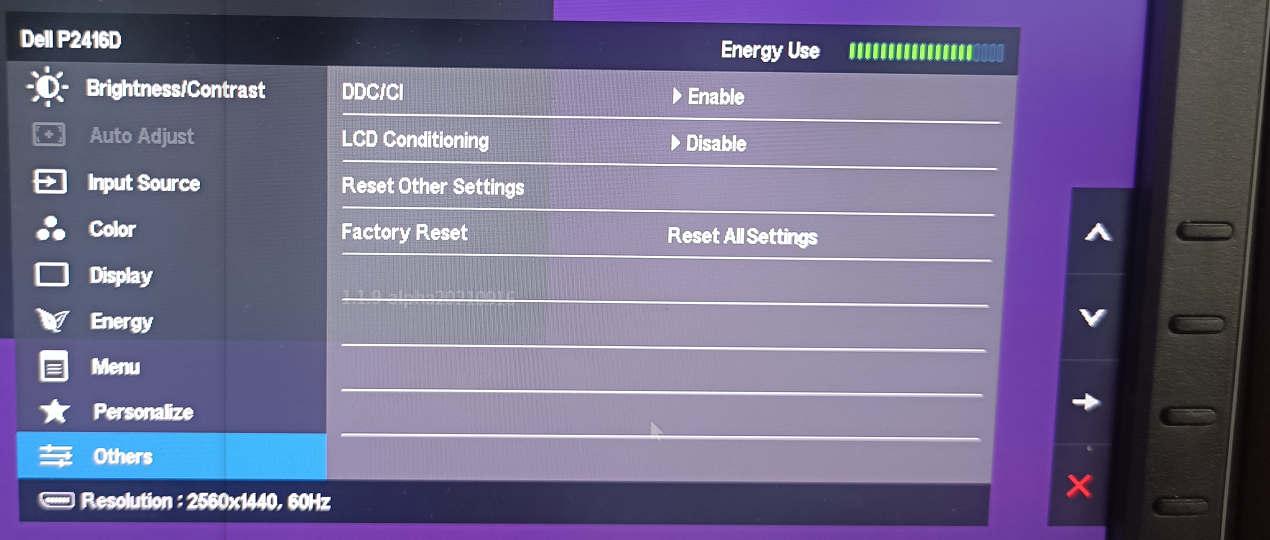
- Graphics drivers issues - Check with your device manufacturer's website for the latest graphics drivers. Outdated/corrupted graphics drivers can cause DDC/CI communication to stop functioning.
3 Firmware Upgrade
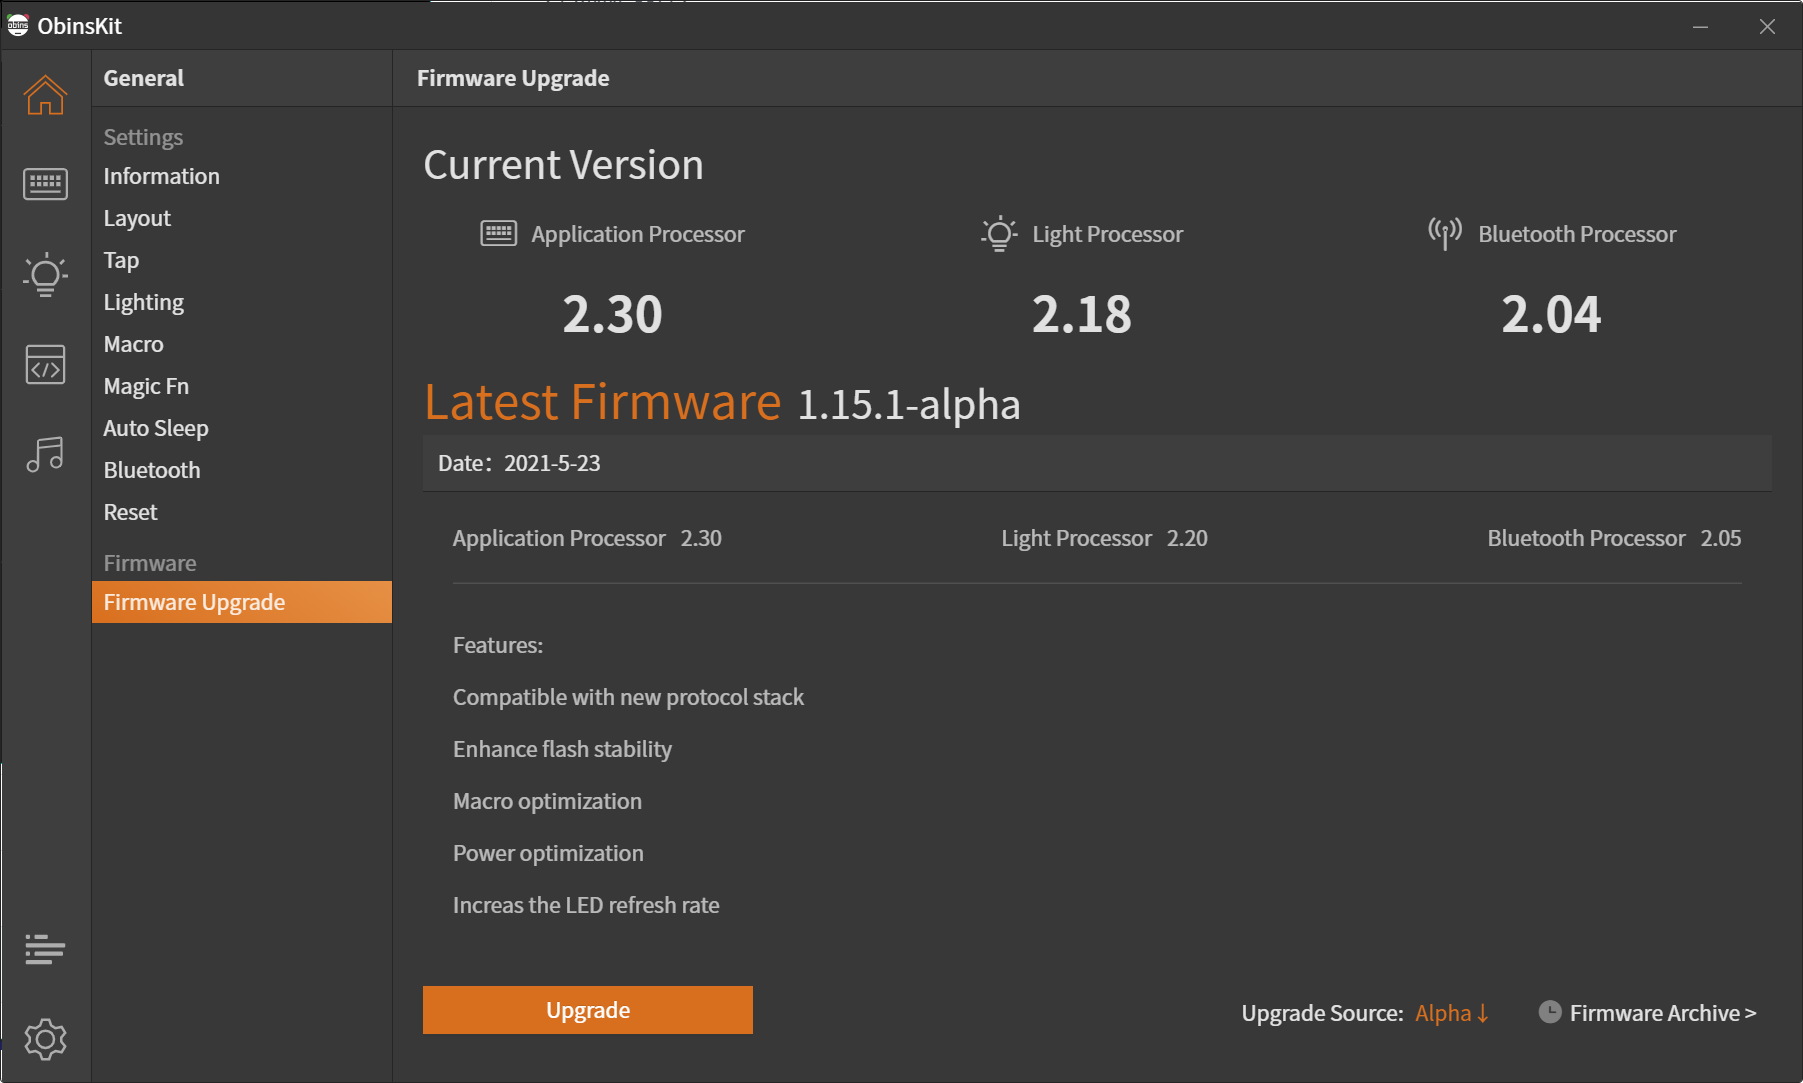
In this page, you will get the latest firmware.
For a better experience, we recommend upgrading to the latest.
Upgrade to latest
It's quite simple, just click the "Upgrade" button, what't all.
Looking for a experimental firmware
Click the text next to "Upgrade Source"
Looking for a old firmware
Click "Firmware Archive" button
Abnormal recovery
If an accident(e.g. power failure, reboot, computer crash, and other unpredictable situations) occurs during the firmware upgrade, the keyboard can't be used.
In this situation, you can use the abnormal recovery mode to recover the keyboard.
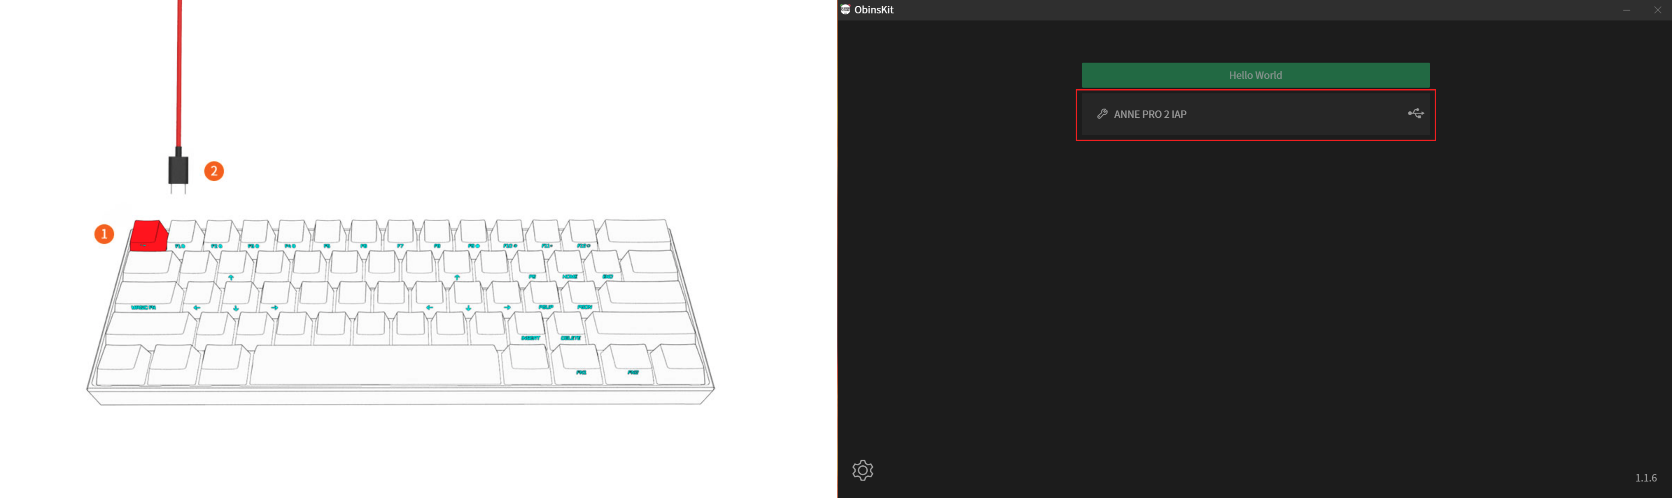
Turn off the Bluetooth switch on the back of the keyboard
Hold on Esc, plug in the USB cable. Release Esc key while "USB-HID IAP" show up on the screen
Select "USB-HID IAP" item to upgrade firmware again